
Owning a home is one of the most significant investments most people will ever make, yet the true cost of homeownership is determined by how well the physical structure is preserved over time. Residential structures are continuously subjected to environmental forces. Ultraviolet radiation bakes exterior surfaces, wind-driven rain searches for tiny pathways into the building envelope, temperature fluctuations expand and contract structural framing, and shifting soil creates immense pressure beneath concrete footings. Left unchecked, minor defects inevitably evolve into catastrophic structural failures that can drain personal finances and diminish equity.
A proactive visual and physical inspection protocol serves as the primary defense against unexpected property destruction. While municipal building codes enforce safety standards during original construction, everyday environmental exposure gradually degrades materials. Homeowners often make the mistake of waiting for active symptoms, such as water dripping through a ceiling drywall seam or a door refusing to latch, before paying attention to their property’s condition. By that point, secondary damage such as saturated insulation, structural framing rot, or interior finish degradation has already occurred.
Conducting a thorough, top-to-bottom audit allows homeowners to identify vulnerabilities early. Moving methodically from the upper exterior down through the living zones and finally to the soil-contact structures establishes an organized diagnostic routine. The following guide details the critical warning signs, inspection steps, and maintenance practices required to ensure your property remains sound, safe, and resilient year after year.
Spot Warning Signs on the Upper Exterior
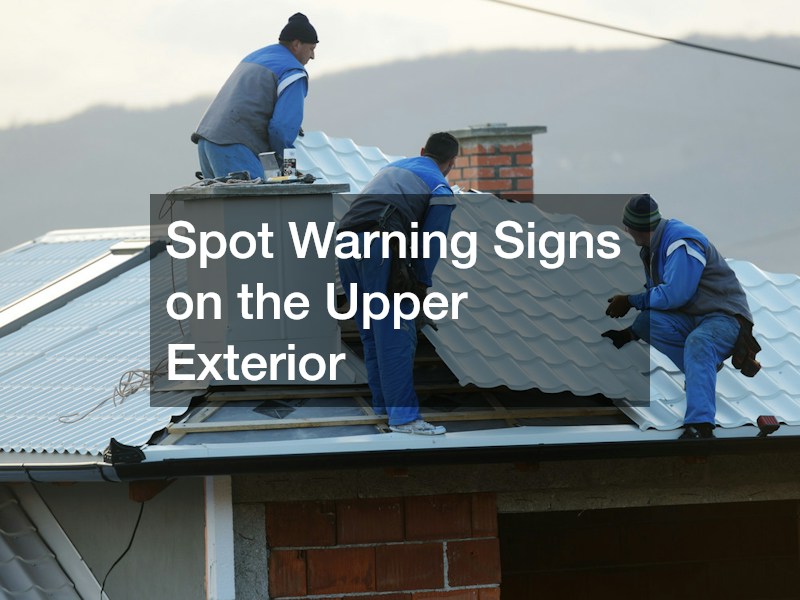
Your home’s primary defensive perimeter begins where sun, wind, and precipitation strike first. Performing a comprehensive visual survey of standard sloped roofing requires binoculars, a steady ladder, and keen observation. Start by examining the condition of individual asphalt shingles or tiles across every directional exposure. South-facing and west-facing slopes typically exhibit faster aging due to prolonged thermal cycling and ultraviolet degradation. Look closely for missing, cracked, buckled, or curling shingles. Pay close attention to the presence of mineral granules in the gutters and downspout discharge zones, as excessive granule loss leaves the underlying fiberglass mat vulnerable to accelerated breakdown.
Catching these localized defects early allows property owners to resolve specific vulnerabilities by arranging local roof repair before moisture penetrates the underlying decking and framing timbers. When damaged shingles are replaced, flashing points around chimneys, vents, and valleys should also be re-caulked and secured to prevent water infiltration during heavy windstorms.
- Shingle condition: Scan for cupping edges, clawing centers, hairline surface tears, or sections completely ripped away by wind gusts.
- Flashing integrity: Check sheet metal flashing along valley lines, dormers, chimneys, and plumbing boot vent penetrations for oxidation or separated caulk seams.
- Gutter systems: Ensure continuous slope toward downspouts, secure loose fascia fasteners, and clear accumulated organic debris that creates water damming.
- Soffit and fascia panels: Check timber and aluminum overhang components for water staining, peeling paint, splintered grain, or gnaw marks.
When the visual inspection uncovers widespread surface degradation, widespread sagging along the ridge board, or multiple compromised valleys, attempting small patches becomes counterproductive. In these situations, scheduling a formal assessment by a licensed roofing company ensures a certified contractor climbs the surface, measures moisture levels in the plywood underlayment, and inspects the structural rafters from inside the attic cavity. A professional evaluation distinguishes between cosmetic weathering and structural deck rot, ensuring your remediation strategy is based on sound engineering requirements rather than guesswork.
Preserve the Lifespan of Non-Traditional Canopies
While architectural shingles dominate suburban neighborhoods, many modern additions, low-slope extensions, detached garages, and flat-roofed designs rely on single-ply membrane assemblies such as ethylene propylene diene monomer (EPDM) or thermoplastic polyolefin (TPO). These low-slope configurations cannot rely on gravity to shed moisture rapidly, meaning water often lingers after heavy downpours. Inspecting single-ply systems requires checking for ponding water that remains forty-eight hours after rain ceases, as standing water accelerates membrane weathering and adds dead weight to ceiling joists. Examine field seams, corner flashings, and mechanical terminations along parapet walls for adhesive failure or shrinkage cracks.
Maintaining a flat or low-slope assembly demands specialized care, which is why routine rubber roof maintenance remains indispensable for preventing premature membrane hardening, punctures, and seam delamination. Keeping the membrane clean of debris, washing off industrial fallout with gentle cleansers, recoating surfaces with reflective elastomeric sealants, and treating mechanical penetrations will preserve membrane flexibility across changing seasons.
- Membrane surface: Inspect for blistering, puncturing from tree branches, surface chalking, or wrinkles indicating sub-surface movement.
- Termination bars: Verify that metal edging and mechanical wall clamping strips are seated tightly with resilient sealant along parapet walls.
- Scuppers and drains: Clear interior drains and perimeter scupper openings to ensure unobstructed drainage under severe rainfall conditions.
- Expansion joints: Examine elastomeric expansion joints for tensile fatigue, separation, or mechanical tears caused by structural shifting.
For property owners weary of repeating membrane treatments or replacing short-lived composite materials, exploring alternative durable surfaces represents a sensible long-term improvement. Gathering several detailed metal roof estimates provides clear insight into the upfront capital required to install standing seam panels or stone-coated steel assemblies. Evaluating these metal roof estimates allows homeowners to compare gauge thicknesses, paint finishes, wind-resistance ratings, and long-term warranties against their current maintenance costs.
Calculate the Costs of Overhead Upgrades

Investing in overhead protection requires balancing material life expectancies against installation costs. When an existing overhead system reaches the end of its functional life—usually around twenty years for basic asphalt—homeowners must evaluate full replacement proposals. It is vital to scrutinize the full scope of work, including tear-off fees, ice-and-water barrier installation, drip edge upgrades, and ventilation balancing. Comparing multiple roof estimates ensures you obtain competitive pricing while confirming that each prospective contractor provides identical material specifications, ridge vent calculations, and disposal provisions.
- Material specifications: Confirm the brand, line, fire rating, and wind-resistance warranty of the shingles or structural panels being quoted.
- Sub-decking allowances: Ensure the proposal defines replacement costs per square foot for damaged structural plywood encountered during tear-off.
- Ventilation upgrades: Verify that intake soffit vents and exhaust ridge vents are calculated to achieve continuous passive airflow throughout the attic.
- Workmanship warranties: Compare the duration and transferability of labor warranties alongside the manufacturer material guarantees.
Failing to act promptly on a failing canopy can lead to catastrophic internal water breaches during sudden storms. When an unaddressed leak floods the attic insulation, cascades through ceiling fixtures, and saturates drywall walls, standard home drying techniques are rarely sufficient. In such emergency situations, hiring a certified water damage restoration company becomes essential to deploy industrial dehumidifiers, extract hidden moisture pockets, and sanitize wet building assemblies before structural rot and microbial contamination spread through the living quarters.
Eliminate Biological Hazards and Unwanted Intruders
Once interior moisture enters a home through an overhead leak, plumbing failure, or high ambient humidity, secondary biological threats emerge rapidly. Fungal spores exist naturally in the air, but they require consistent moisture, warmth, and organic cellulose material to establish colonies. Thoroughly check ceilings, interior drywall, utility closets, crawlspace subfloors, and basement rim joists for discoloration, bubbling paint, or musty smells. Special attention should be directed toward hidden areas, including the back walls of laundry closets, under-sink cabinetry, and baseboards adjacent to exterior walls.
If suspicious dark staining, persistent humidity, or respiratory irritation occurs among occupants, ordering an environmental mold inspection will identify the specific fungal strains present and quantify spore concentrations relative to outdoor baselines. Certified technicians use moisture meters, thermal imaging cameras, and air sampling cassettes to evaluate cavities behind walls without causing unnecessary demolition, providing a clear remediation protocol if contamination is detected.
- Visual anomalies: Check for black, green, white, or powdery discoloration across drywall, baseboard trim, and timber framing.
- Olfactory indicators: Note damp, earthy, or musty odors that linger in closed rooms, crawlspaces, or utility basements.
- Surface moisture testing: Use a pinless moisture meter on suspicious drywall to identify moisture reservoirs behind painted surfaces.
- HVAC coil inspection: Examine air handler drip pans, evaporator coils, and flex ducting for condensate accumulation or surface mold growth.
Excess moisture and biological growth also attract pests that exploit decaying timber and humid microclimates. Subterranean termites, carpenter ants, silverfish, and wood-boring beetles thrive where elevated moisture softens wood framing. Homeowners should conduct an exterior wall inspection, checking the foundation interface for mud tubes, wood shavings, and chewed insulation. Implementing an integrated pest management program combines environmental sanitation, exclusion sealing around pipe penetrations, and targeted soil treatments to stop wood-destroying organisms before they undermine the framing.
Detect Underground Moisture Before Floors Buckle

While overhead leaks are often noticeable immediately, moisture problems originating beneath the ground level present subtle and destructive threats. Homes built on concrete grade slabs house high-pressure copper or PEX water lines embedded directly within or below the structural concrete. Over time, thermal friction, soil movement, shifting aggregate, or chemical corrosion can wear small pinholes in these buried utility lines. Because the piping is encased in concrete, thousands of gallons of water can seep beneath the structure before visible dampness manifests inside living areas.
Homeowners should monitor their monthly water consumption carefully. An unexpected jump in water usage with no change in household habits is often the initial clue of a pressurized sub-slab leak. Walk barefoot across ground-floor hard surfaces to detect localized warm spots on tile or laminate flooring, listen for faint hissing sounds near plumbing walls when fixtures are turned off, and check for damp carpet pads or efflorescence salt crystals forming along lower baseboards.
- Water meter monitoring: Shut off all household faucets and observe the low-flow indicator dial on your exterior water meter to detect unallocated flow.
- Flooring checks: Inspect wood and laminate floors for warping, cupping, or buckling caused by vapor pressure rising through the concrete slab.
- Audible diagnostics: Listen for running water inside walls, under vanity cabinets, or through the foundation floor when the home is quiet.
- Foundation perimeter dampness: Check the exterior concrete stem wall for unexplained puddling or moss growth during dry weather.
Confirming an underground plumbing breach requires specialized acoustic listening discs, line tracing equipment, and thermal imaging cameras operated by leak detection professionals. Securing prompt slab leak repair preserves the structural integrity of your floor and prevents soil erosion that would otherwise undermine concrete footings. Once the source is located, technicians determine whether targeted concrete direct-access extraction, horizontal pipe rerouting through attic spaces, or epoxy pipe lining offers the least disruptive long-term fix.
Measure Structural Shifts Around the Perimeter

The entire weight of a residential building is ultimately transferred downward to its foundation footings and concrete walls. Soil characteristics directly impact the stability of this support system. Expansive clay soils swell significantly when wet and contract during drought periods, exerting lateral pressure on basement walls and uneven uplift beneath concrete slabs. A seasonal walk around the home’s exterior perimeter is essential for monitoring ground movement. Look for cracking along exposed concrete, displacement in brick masonry mortar beds, and separations around window frames or exterior doors.
Inside the home, structural movement presents clear indicators. Interior doors that suddenly begin sticking, latch plates that no longer align, drywall cracks extending diagonally from the upper corners of door frames, and uneven, sloping floors all indicate underlying settling. Keep a written log with dates and millimeter measurements of any exterior hairline fissures to determine whether the movement is active or has stabilized.
- Exterior masonry cracks: Look for stair-step fissures running through brick mortar joints or horizontal shear cracks across concrete block walls.
- Corner fractures: Examine the corners of foundation walls for diagonal shear cracks where soil movement places tension on concrete corners.
- Window and door alignment: Check whether openings remain square, or if gaps appear between casing trim, window jambs, and adjacent drywall.
- Chimney separation: Inspect exterior masonry chimneys to verify they remain plumb and have not pulled away from the exterior wall siding.
If foundation cracks exceed one-quarter of an inch in width, display horizontal displacement, or cause structural settlement across rooms, immediate professional intervention is necessary. Engaging a structural contractor for foundation repair may involve installing steel push piers, helical screw piles, carbon-fiber wall reinforcement straps, or hydraulic slab leveling. Addressing these deep structural issues early stabilizes the building envelope, prevents plumbing lines from shearing, and maintains the safety and resale value of your property.
- Foundation walls: Inspect exposed concrete and mortar joints for cracks, spalling aggregate, or white powdery efflorescence.
- Crawlspace support posts: Check timber support posts and concrete piers for dry rot, shifting, plumb alignment, and secure bracket connections.
- Exterior grading slope: Ensure the ground slopes away from foundation walls at a minimum decline of six inches over the first ten feet.
- Downspout extensions: Direct downspout discharge pipes at least five to ten feet away from perimeter footings to minimize localized soil saturation.
Maintaining a residential home requires an understanding of how each building component works as part of an integrated protective system. A failing roof allows rainwater to saturate insulation, promoting biological growth that compromises indoor air quality and attracts destructive pests. Similarly, unaddressed ground moisture and sub-slab plumbing leaks destabilize sub-surface soils, which leads to shifting foundations, distorted exterior walls, and cracked structural assemblies.
Homeowners who schedule regular, methodical audits from the roof down to the foundation can catch minor wear and tear before it creates serious safety issues or costly repairs. By staying observant, understanding early warning signs, and addressing vulnerabilities with appropriate maintenance and timely upgrades, you protect your home’s structural integrity, safety, and financial value for decades to come.
